
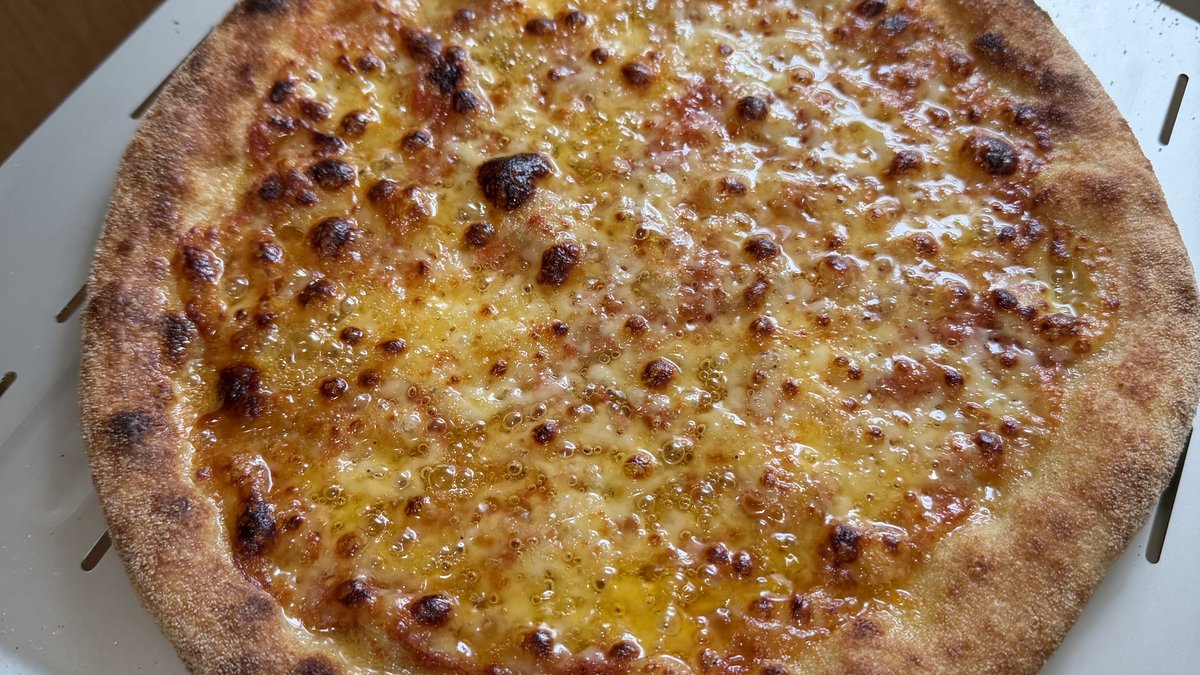
The 72 Hour Poolish Pizza Guide
Learn about and unlock the ultimate Neapolitan crust, with big air bubbles, and deep flavor
Poolish is a preferment that will give your pizza a more complex taste, stronger gluten network, crispier crust, and it's also easier to digest. Preferments are a mix of flour, water, and yeast portioned from the main dough recipe, fermented, and then combined back with the main recipe. The length and type of fermentation depends on when you need the poolish. With this guide, you'll make the poolish and let it ferment for 24 hours in the fridge. The next day you'll use the poolish and make the dough. The dough will rest and ferment in the fridge for 48 hours, and then you're ready to make pizza.
Sample Schedule
Thursday - Make Poolish
Friday - Make Dough
Sunday - Make Pizza
My history with preferments starts with my experience learning and experimenting for this guide. I want to be able to stick with bakers percentages, to look at how much main dough I am making and create the poolish as a part of that. I want to be able to calculate yeast while accounting for the multiple fermentation periods.
It sounds simple but took me awhile to figure out what the % of poolish is, how to keep the poolish defined in %'s.. and poolish is just one type of preferment, other types such as biga have different ratio of flour to water. The yeast is calculated based on time and temperature still but with an additional factor: the yeast's leavening strength increases as you ferment the poolish - this has to be in the expected range for the main dough process, it's salt and time and temperature.
I've added this capability to the dough calculator, and the dough pillar to use for your own recipes. Based on your dough schedule an appropriate amount of yeast will be calculated for the poolish and main dough phases.
Dough
Poolish + NeapolitanPoolish + NeapolitanIn a poolish the flour amount is based on a percentage of the main recipe's flour. We're using a commonly used value of 30% poolish in this guide. The water amount in a poolish is based on 100% of the poolish's flour amount. Yeast is calculated based on the amount of flour in the poolish, and the fermentation times and temperatures.
The duration of this poolish, then main dough fermentation times is 72+ hours.
Poolish, and preferments in general are single-user starters. We'll mix a batch, then use 100% of it, and make a new batch next time for the next bake. It is not maintained between bakes like a sourdough living starter.
| Ingredient | % | ~g |
|---|---|---|
| Caputo Blue Pizzeria Tipo 00 Flour | 100% | ~180g |
| Cold WaterWater | 100% | ~180g |
| Active Dry YeastLeaven | 0.375% | ~0.68g |
| Ingredient | % | ~g |
|---|---|---|
| Caputo Blue Pizzeria Tipo 00 Flour | 100% | ~420g |
| Cold WaterWater | 62% | ~192g |
| Sea Salt | 2.5% | ~15g |
| Active Dry YeastLeaven | 0% | ~0g |
- Add the poolish's amount water to container or mixing bowl
- Add yeast and dissolve in the water
- Add poolish's amount of flour on top and mix until combined
- Cover and ferment at room temperature (~72°F) for 2 hours.
- Move poolish to refrigerator (38°F) for 24 hours.
- Next Day. Remove poolish from refrigerator, no need to let it rest you can work with it cold
- Add the remaining water to the poolish, and stir
- Stir the poolish until the gluten that's formed dissolves. You should be able to completely dissolve it.
- Pour the poolish into the mixer's bowl
- Add the remaining flour to the mixer's bowl
- Start mixing with dough hook, on slowest speed - you might need to scrape the sides to get all the flour incorporated
- Continue mixing on slowest speed for total 4 - 5 minutes
- Turn dough out onto dry surface (no flour, no oil)
- Hand knead dough until dough reaches 74°F
- Ball up on one bulk dough, place in bowl and cover. Ferment at room temperature (~72°F) for 2 hours
- Divide into equal parts, and ball up individual dough balls
- Store dough balls in pizza dough trays or lightly oiled plastic container with lid in refrigerator (38°F) for 48 hours
Sauce
Basic Pizza Sauceoptimized for blenderThis is a basic tomato sauce for pizza. The tomato's I use (Centos San Marzano whole-peeled) come with some basil in them. Adjust salt to taste or if your tomato's have more or less salt in them to begin with. The ingredients are maintained in bakers percentages based on main ingredient (e.g. tomatoes), calculated for your batch size. 800g example is based on 800g/28oz can size. You can crush these in your hands, using a blender is not necessary, it's just easier. Only use blender on lowest speed setting, and blending takes no time at all 5-10 seconds.
| Ingredient | % | ~g |
|---|---|---|
| Canned Whole-Peeled San Marzano TomatoBase | 100% | ~800g |
| Sea Salt | 0.5% | ~4g |
- Remove carafe from blender
- Empty can content into carafe
- Add salt to carafe
- Cover carafe, return to blender
- Blend on lowest setting for ~10 seconds
- Remove carafe from blender
- Check tomato consistency and stir to ensure salt is incorporated
- Use, or portion and use right away and freeze the rest
Shaping
Neapolitan Style PizzaHandHow to get a beautiful round pizza with just the right thickness on crust and edges. Learn this stretching technique as a series of repeatable steps. Prepare, extract, shape, stretch, develop a crust, and apply your toppings as you prepare your pizza for baking.
- Ensure pizza oven is at target temperature. Start stretching out dough after oven is ready to go
- Place peel next to your work area and dust with semolina
- Place a mound of semolina on your work surface, large enough to drop your dough onto and deep enough that it will stay above the work surface
- Using a scraper to remove dough from storage, preserve the bottom as the bottom and top as top, and place onto semolina mound upside-down. If the dough is mishapen, gently help it be round again now.
- Use fingers with light pressure, starting at the center and working towards the top, leaving the crust. Flip dough and repeat, pressing dough out of other half/from the other side. Turn dough 90 degrees and repeat, then flip dough and repeat.
- For final stretch, pick up dough and rest the crust on your knuckles. Rotate the dough over your knuckles. Depending how strong your dough is, raise or lower dough off the work surface to adjust the effect of gravity stretching your dough
- Drop dough down onto launching peel, minimally adjusting back into shape
- Add sauce, take care not to press dough down into peel while spreading sauce
- Add cheese and toppings, take care not to stack more than one layer. Cheese can overlap or leave sauce exposed +/- 20%, toppings should be spread out - try it, adjust to taste
- This pizza must be baked now, continue to your baking steps
Baking
Low Neapolitan StyleDeck700°F · 3.5 minThe pressure is on, but it doesn't need to be. Slow down time and let yourself focus on exactly how to launch, turn, and bake your pie without any flops, tears, or burns. Maximise every opportunity to learn the muscle memory, effort, and feedback of baking your pizza.
- Preheat oven to target temp (700F) If your oven has digital controls, set heat to 700 and 5:2 top:bottom heat ratio
- For analog controls, check oven air temperature and raise or lower heat setting towards target temperature
- Once air temperature is settled, check oven stone temperature and raise or lower heat setting towards target temperature
- Your pizza should be on a peel waiting to be launched at this time
- Look in the oven, find a spot in the center/back part of the oven to target
- Enter the oven with peel, parallel to the stone deck and place the front edge of the peel on your target
- With a controlled, deliberate motion, drop the front of the pizza on to the stone
- Continuing the controlled, deliberate motion, keep momementum of pizza sliding off peel and laying on stone deck
- Turn pizza as needed. Ensure pizza is loose on stone, then using a turning peel lift one side of the pizza - pull it towards you while rotating pizza peel back under pizza continue rotating pizza, then lift and return pizza to original target spot
- Check pizza bottom. If pizza bottom bakes faster than top, lift pizza with turning peel and raise to sear the top in the hottest air in the highest part of the oven
- Use peel to remove pizza and place on wire cooling rack for 2 - 3 minutes
- Slice pizza through center every 60 degrees
- Enjoy a job well done
Want to use this guide?
Create a free account or sign in to copy this guide to your account.